Customer upload guide
Send photos and videos to your marketing team
Follow these steps on your phone to sign in securely, select a business, upload content, and check its status.
Step 1
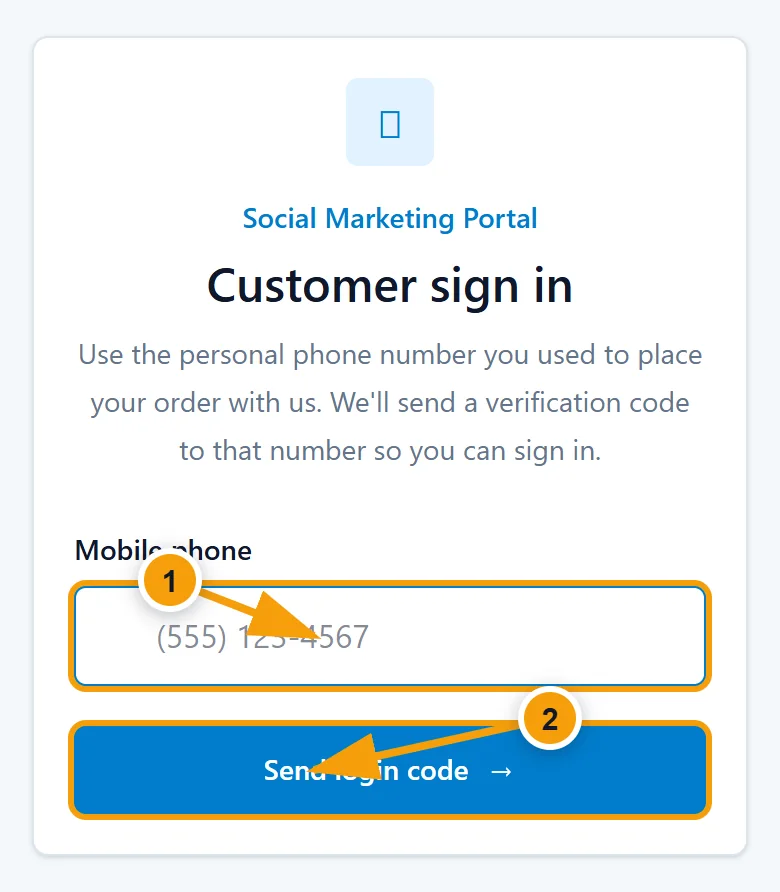
Sign in with your phone number
Open the customer portal and enter the personal phone number used for your order.
Tap “Send login code.” A verification code will be sent to that phone.
Expected result: The verification screen opens and a code is sent to your phone.
Step 2
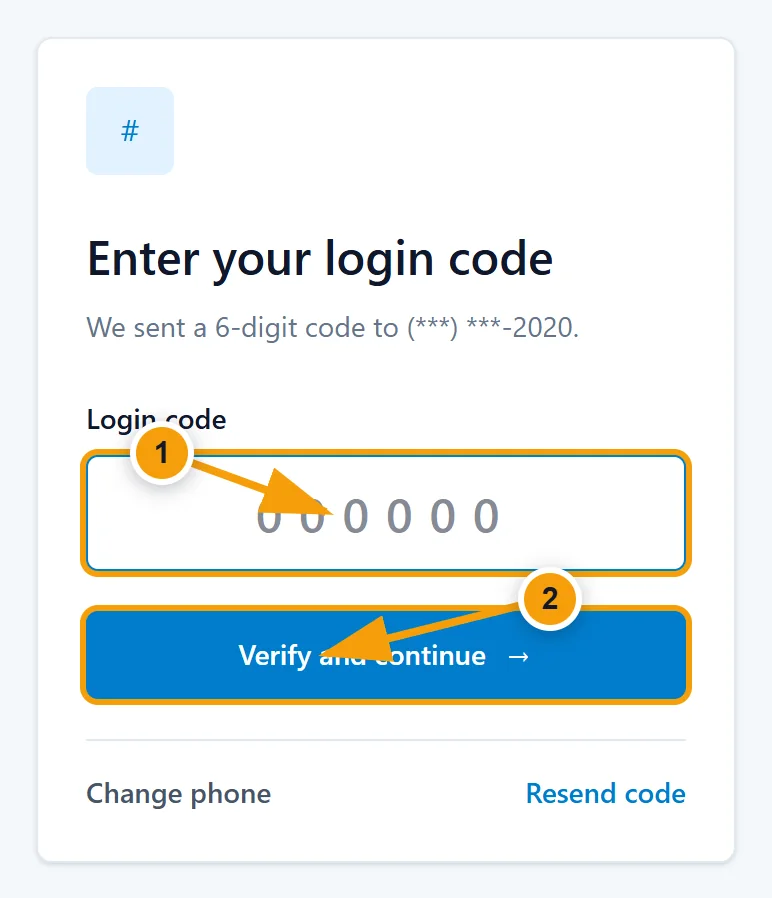
Enter the 6-digit verification code
Enter the latest 6-digit code, then tap “Verify and continue.” Never share this code with anyone.
If it expires, request a new code. Use “Change phone number” if the displayed number is incorrect.
Expected result: You are signed in and can see the businesses linked to your account.
Step 3
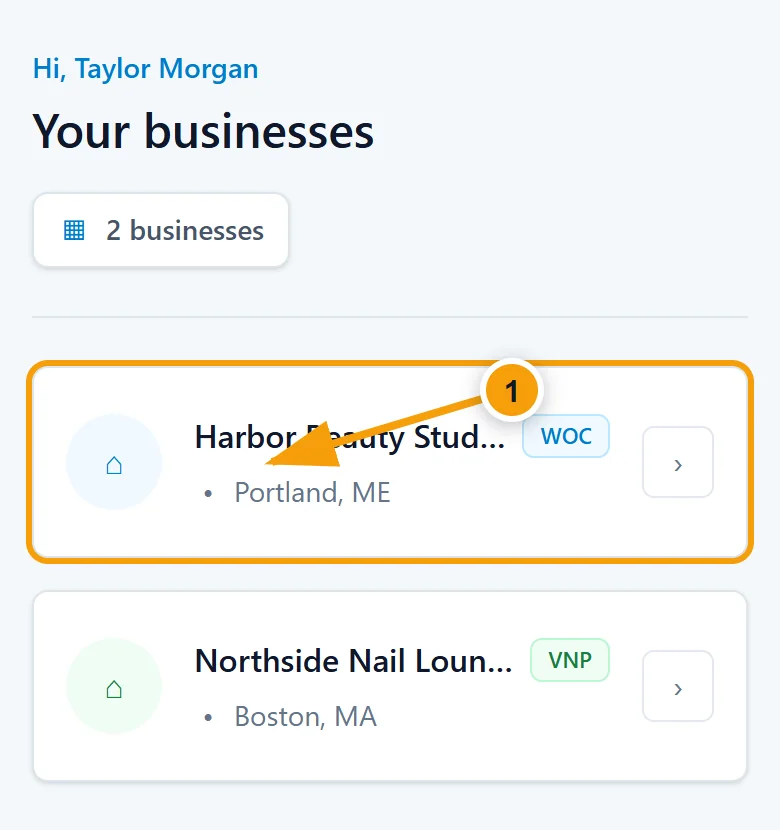
Choose the correct business
Tap the business that should receive this upload. If a business is missing, contact your marketing team before continuing.
Expected result: The selected business page opens.
Step 4
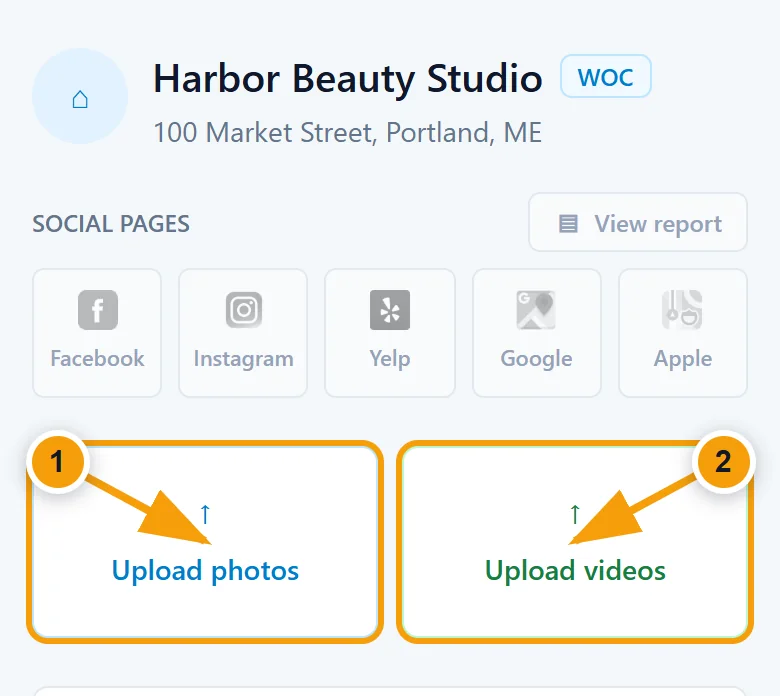
Choose photos or videos
Tap “Upload photos” for images or “Upload videos” for video files. Send one content type per upload.
Expected result: The upload form for the selected content type opens.
Step 5
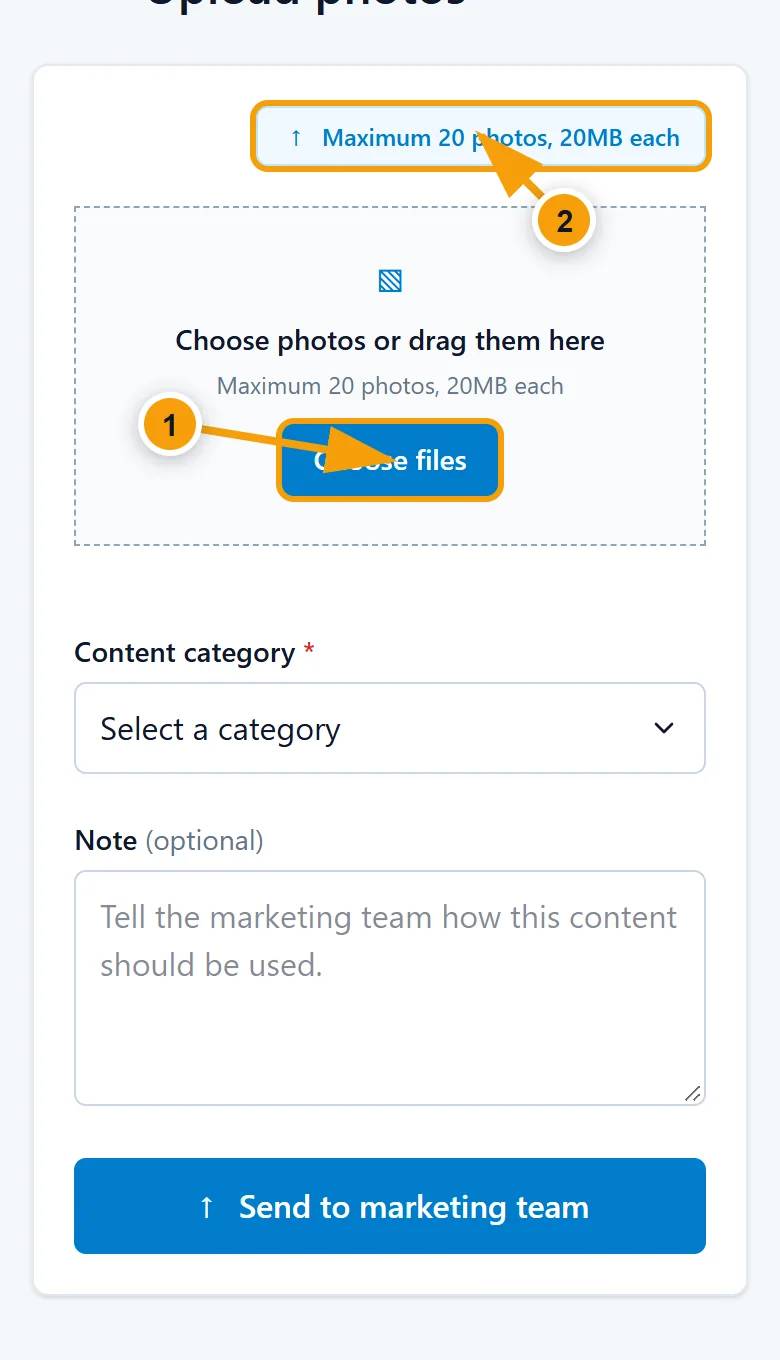
Select files and check the displayed limits
Read the current file-count and file-size limits shown on the upload screen, then tap “Choose files.” Select files from your phone and remove any incorrect selection before continuing.
Expected result: The selected files appear in the upload form without a validation error.
| Content type | Supported formats |
|---|---|
| Photos | JPG, JPEG, PNG, WebP, HEIC |
| Videos | MP4, MOV, M4V |
The portal may reject a supported format when the file exceeds the current limit shown on screen or the file is damaged.
Step 6
Complete the upload form
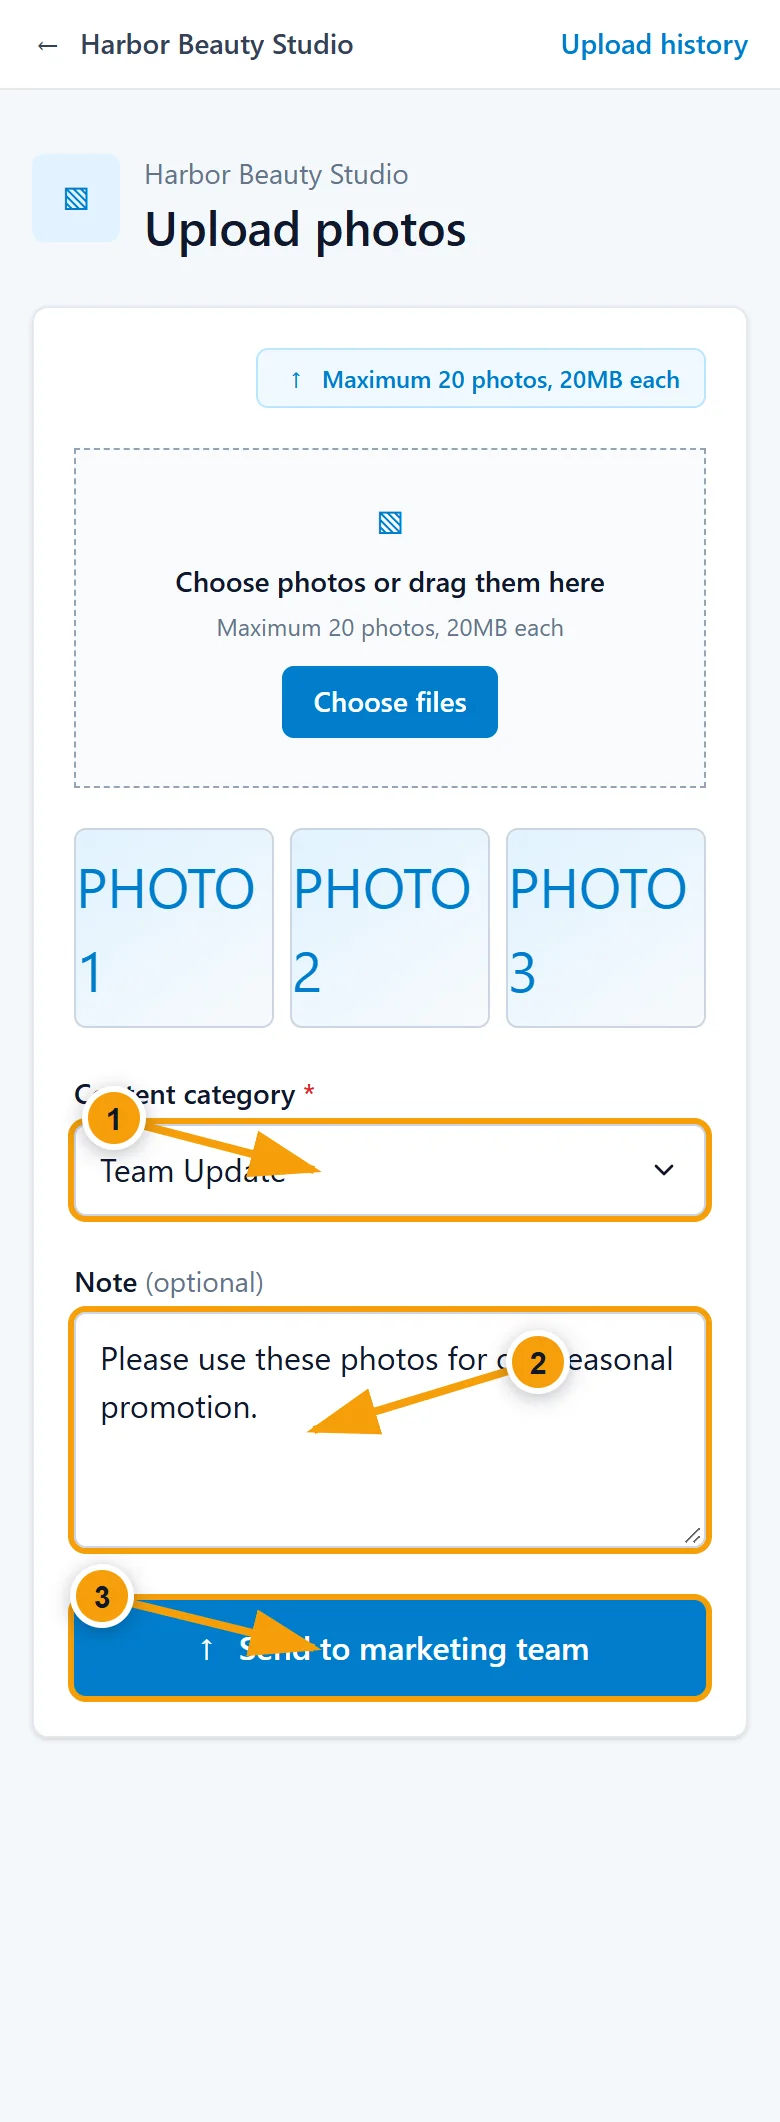
Review the selected files, choose a Content category, and add a Note when the marketing team needs context or instructions.
Tap “Send to marketing team” when everything is correct.
Expected result: Upload progress starts.
Step 7
Wait for the upload to finish
Keep the page open and your internet connection active until the portal confirms completion. Do not close the browser or switch off your connection while files are uploading.
- If progress stops, check your connection and try the upload again.
- Do not submit the same files again after a successful confirmation.
Expected result: The portal confirms the submission and makes it available in Upload history.
Step 8
Check Upload history
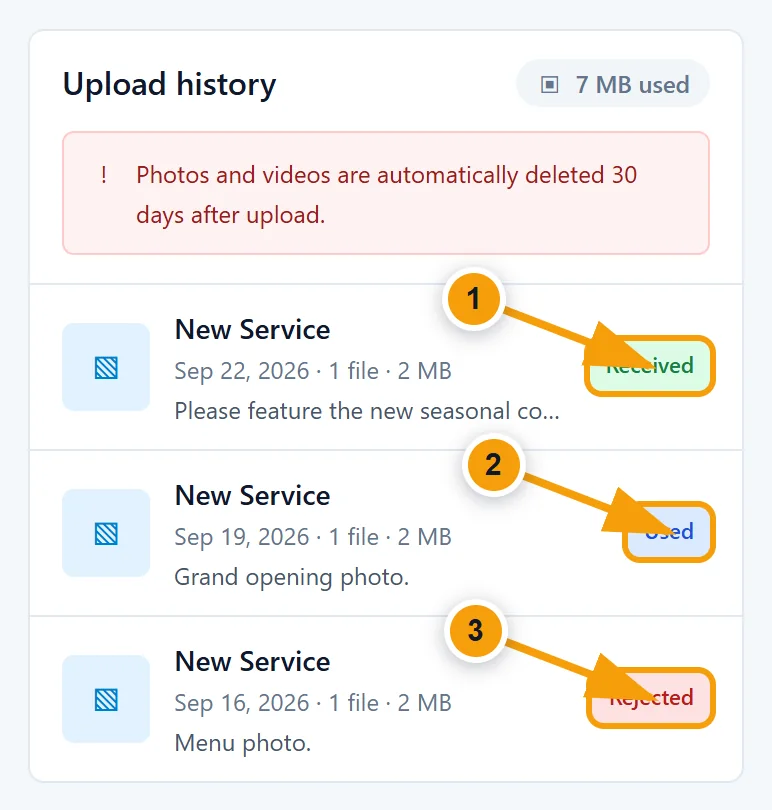
Open Upload history for the business to confirm the submission, view its status, and read any rejection reason.
Expected result: You can find the submission and understand what happens next.
| Status | Meaning |
|---|---|
| Received | Your files reached the marketing team and are waiting for review. |
| Used | The marketing team used or processed the submitted content. |
| Rejected | The submission cannot be used. Open it to read the reason, correct the issue, and upload again if needed. |
Media retention: Your photos and videos are automatically removed after the number of days shown in Upload history. The submission record may remain after the media is removed.
Quick help
Troubleshooting
| Problem | What to do |
|---|---|
| Code expired or not accepted | Request a new code and enter only the newest 6-digit code. Confirm that the phone number is correct. |
| File is not accepted | Check the supported format and the current size and file-count limits displayed on the upload screen. Try opening the file on your phone to confirm it is not damaged. |
| Upload was interrupted | Reconnect to a stable network, keep the portal open, and start the upload again. Check Upload history first to avoid a duplicate submission. |
| Submission is Rejected | Open the submission, read the rejection reason, correct the issue, and send a new upload if requested. Contact your marketing team if the reason is unclear. |
Ready to send your content?
Sign in to the customer portal and follow the steps above. Your marketing team will receive the files after the upload completes.
Sign in